Showing posts with label DIY. Show all posts

Sunday, 23 June 2013

Glitter sneaker Vol. 2

 A year ago i made these baby pink ribbon glitterati sneakers. I loved them since before they were born but didn't have that much of a chance wearing them because they cracked after I wore them twice or so.
 This year I decided to give them another chance (the same bad quality shoes) and give them a small twist with a black ribbon.


For a more detailed procedure you can check here.

Which one do you like better?

Tuesday, 19 February 2013

Saving a sweater, elbow patches

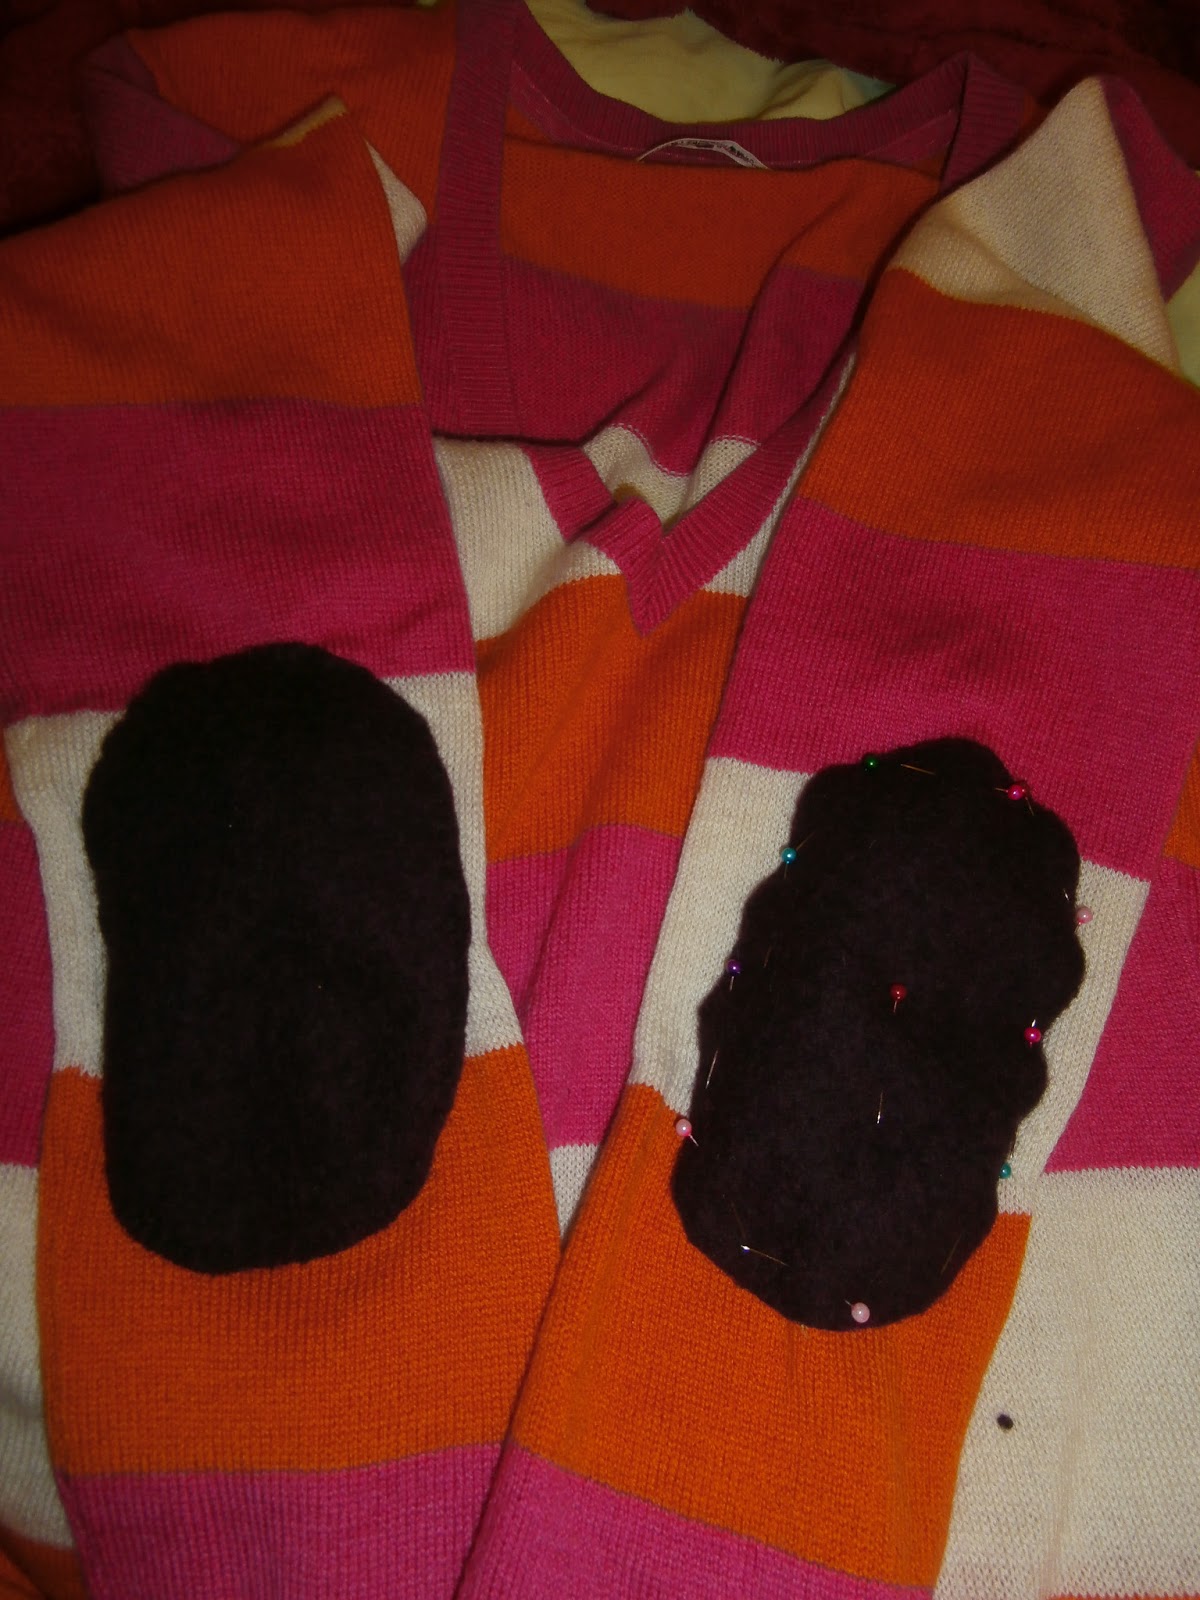
 My flatmate had this sweater since forever I guess, though you could never tell, and she was about to trash it because both of the sleeves were torn under the elbows. Fortunately I stopped her on time, borrowed it for a couple of hours and gave it back refashioned and ready to wear, with the elbow patches on.

Firstly I mended both of the holes to prevent it from further ripping and then I just hand stitched wool patches that I previously cut out from some leftover material I had.


Have a nice week everyone!

Friday, 25 January 2013

Melted crayon art

Crayon art
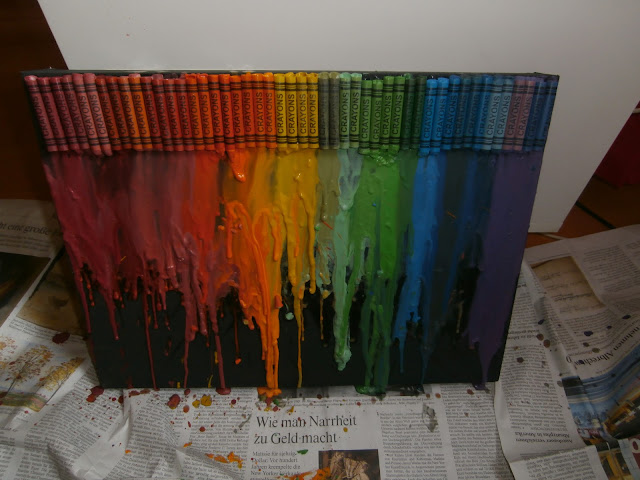
 Ever since I bumped into the first melted crayon canvas on Pinterest I wanted to do it. One of my friends graduation was coming along and I thought it was the perfect gift, rainbow colors crayons turned into an art piece. The whole process was so simple that even a first grader could do it.
I hope my friend will like it as much as I do.
Get your hands on some crayons and start making art!

What I used:
- 30x40 cm canvas
- black and white acrylic paint
- 48 crayons
- hot glue gun
- hairdryer

1. Paint the canvas black (or you can just leave it as it is) and wait till it dries.
2. Arrange the crayons to see exactly how many you need. I matched rainbow colors from 2 boxes of 36 crayons, leaving out "unhappy" colors like brown and grey.
3. Glue the crayons onto the canvas and let it dry.
You can peel the wrappers off your crayons. I liked the writing, so I left them.
4. Prop up the canvas so it is upright and protect your working surface with some old newspaper because the wax will splatter.
5. Turn blow dryer to high heat and aim it towards the middle of the crayons, pointing downwards. It may take a while before they start to melt.
If you wave the blow dryer back and forth across the entire canvas, the wax won’t drip straight down, but I wanted it to be a bit messy, it's up to you.
You can see that the tips have melted down. If you don’t like that, be sure to quit melting them earlier.
6. Let the crayons cool before moving the canvas. Be careful when storing your art in a hot area (the wax will continue to melt if it gets hot enough).
7. Personalize it with a few words. I used white acrylic paint and a small brush.
melting crayons
Hope you like it!
Have a wonderful weekend!

Wednesday, 12 December 2012

My first big sewing project

 It has been a year since I started sewing learning to sew. I made quite a few purses, but I haven't really moved on from that point for a while and with the beginning of the new school year I felt I should push on.
My goal was an over the top embellished faux leather jacket. Inspiration, Balmain spring 2011
Balmain S/S 2011 photo credit Glamour
The whole process was very long, it took me hours and hours of cutting, sewing, re-cutting, measuring, broken needles, running out of thread, running out of material, written and video tutorials, tutorials in Chinese on youtube, sleepless nights, a mess in my room, needles, pieces of thread and fabric all over the place, not letting my flatmates and my neighbors sleep, countless visits to the closest haberdasher's.

Building a jacket
Sleeveless, Harley, anyone??

Monday, 26 November 2012

Studded converse-like shoes

 
 Wandering through the shops of chinatown, I've found these supper sweet and sooo cheap red converse-like shoes that were begging me to get them and to make good use of them. In another shop I've seen some studs that seemed interesting enough, so I thought I'd give it a try.
 I have to say that I'm not a big fan of intellectual property theft, especially of something as iconic as these shoes are (that's right, for me they are shoes, not sneakers), so I had to think twice. It was, wearing "fake" converse (they don't have a brand tag, but the design is totally stolen), or spending 40 euros (yes, that's the price in Italy) for the original pair. Normally I would opt for the original solution, but since we're talking the 2 seasons trend (the studs), I went for the cheap one!

What you'll need:
- 60 cone studs
- a pair of shoes
- a pair of scissors (or a screwdriver) to press stud closures


Place your studs randomly, I started from the bottom of the shoe

 The whole thing was very easy to make, you just puts studs randomly and you're done. The only part that was a bit tricky was a counter part of the shoe because of the foxing. It was so hard that I literally crashed a couple of studs... but fortunately persistence pays off!

Happy Monday!

Wednesday, 17 October 2012

Studded ballet flats

 Studs and spikes are an absolute must have this season (next to burgundy (and) leather). In case you still haven't procured yourself this fall's trends, I made a simple DIY to be on trend easily and on the budget.

You'll need:
- a pair of simple plain ballet flats (I got mine at H&M)
- 40 10mm triangle studs (I found them on the Ebay quite cheap, but waited for a month to have them delivered from Hong Kong)
- scissors (I used them to press the studs into the shoe and to close the studs)
- 10 minutes of your precious time


 Place a stud on the front part of the shoe to your liking. Press it well onto the shoe, and close the stud on the inner side of the shoe. Continue placing the studs leaving about 10mm of space in between the two (the size of a stud) until you have the whole line covered.


Go out and show them to the world!
P.S. I love my new shoes!

Sunday, 24 June 2012

Glitter sneakers


Bored with your usual white canvas sneakers or just want to add some glamour into your everyday comfy walks?!?! You're in the right place then!
I got inspired while window shopping in Milan some time ago, Miu Miu always manages to put a smile on my face. I found this amazing tutorial by Honestly...WTF, but I wanted to personalize them a bit. This is my adapted version that is less Miu Miu, more me, and the last, but not least, way less expensive. Have fun glittering!

You'll need:

- plain white sneakers
- Mod Podge or any fabric glue
- glitter
- brush
- scissors
- tape
- plastic tray or a cup